Why Measure Recessed Light Ceiling Cutout Size Correctly?

Time:2026-09-20 Author:Mason
0%

A recessed light can look perfectly chosen and still fail at installation. The problem often begins with an incorrect ceiling opening. Learning how to measure a recessed light ceiling cutout size protects the ceiling, fixture, and installation budget.

The U.S. Department of Energy reports that LED lighting can use at least 75% less energy than incandescent lighting. ENERGY STAR also states that qualified LED bulbs may last up to 25 times longer. These benefits matter only when the fixture fits safely and functions as designed. A cutout that is too small may crush the housing or damage drywall. A hole that is too large can leave visible gaps around the trim. Small errors become expensive. Sometimes, surprisingly expensive.

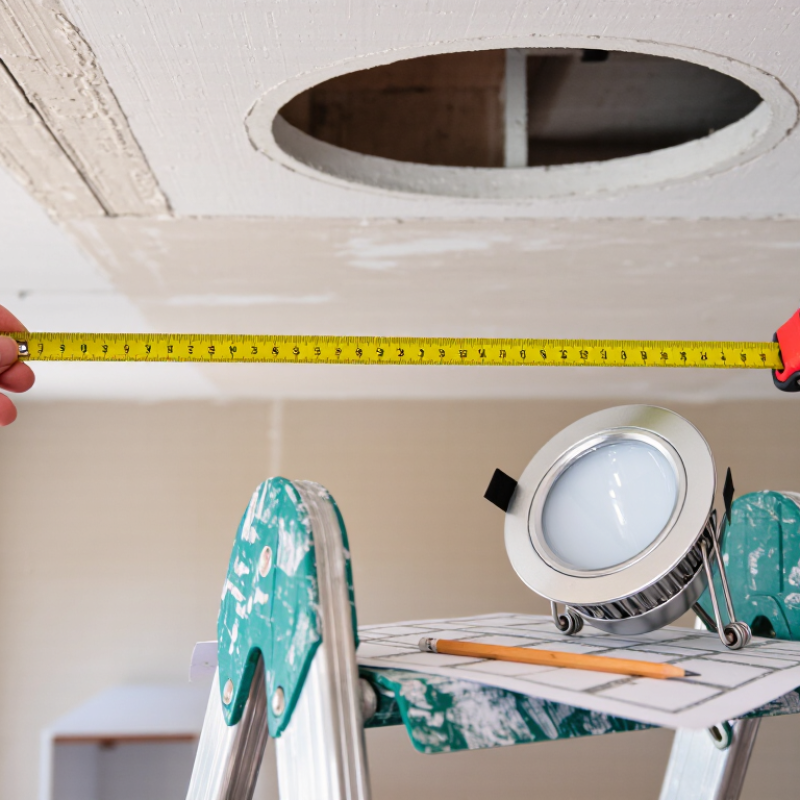
Professional measurement requires more than checking the visible trim. Confirm the manufacturer’s cutout diameter, housing depth, ceiling thickness, and joist clearance. Measure the existing opening in two directions. Record the smallest diameter, not the widest point. Check the template supplied with the fixture. It may differ from the advertised nominal size. Randall Whitehead, a respected lighting designer and author, has said, “Lighting is the jewelry of architecture.” That idea applies here: poor preparation can make expensive lighting look unfinished. The Illuminating Engineering Society also emphasizes coordinated design, installation, and visual performance in its lighting practice guidance. A careful installer should pause before cutting. Recheck the measurement. Even experienced professionals can trust a rounded number too quickly. This guide explains the practical process, common mistakes, and the details that make a clean, secure recessed-light installation more reliable.
Why Measure Recessed Light Ceiling Cutout Size Correctly?

What Is a Recessed Light Ceiling Cutout Size?

A recessed light ceiling cutout size is the diameter of the hole made in the ceiling for the fixture housing. It is not the same as the visible trim diameter. A light may have a 6-inch trim but require a different opening. The measurement must match the installation specification.

Measure the existing opening from one inner edge to the opposite inner edge. Take measurements in two directions. Older drywall openings can be slightly oval, chipped, or enlarged by previous repairs. A flexible tape may give a more honest result than a rigid ruler. I once measured only the trim and ordered the wrong replacement. The light looked suitable, but its housing would not pass through the opening.

Check the cutout template, housing depth, and ceiling thickness before cutting. Leave no guesswork around joists, insulation, wiring, or ductwork. Turn off the circuit and verify that power is absent with a proper tester. A cutout that is too small may damage the ceiling during installation. One that is too large may leave gaps around the trim and reduce stability. A small tolerance is often acceptable, but the fixture instructions control the final limit. This detail is easy to overlook. Even experienced installers can rush it when several lights share the same ceiling. Measuring each opening separately improves fit, appearance, and long-term reliability.

Why Measure Recessed Light Ceiling Cutout Size Correctly?

A recessed light’s nominal size describes its lighting category, not the exact ceiling opening. The chart shows representative cutout diameters commonly used for standard recessed light sizes. Always confirm the fixture template before cutting, because actual dimensions can vary by housing and trim design.

Why Accurate Cutout Measurements Matter

Accurate cutout measurements matter because recessed lights depend on a close, stable fit.

A hole only a few millimeters too wide can leave visible gaps around the trim. A smaller opening may crush insulation, bend spring clips, or delay installation.

The scale is significant.

The U.S. Department of Energy’s 2020 Lighting Market Characterization Report estimated that LED products represented about 48% of installed lighting stock. Many of these products replace older fixtures with different housing dimensions. Nominal sizes are not universal.

A “four-inch” downlight may require a cutout closer to 3.9 or 4.1 inches. Always check the manufacturer’s cutout specification, not only the trim diameter.

Measure the existing opening in at least three directions.

Record the smallest and largest readings. Ceilings can shift, sag, or contain uneven drywall edges. That detail matters. I have seen installers trust one measurement, then discover a circular hole that was slightly oval.

A paper template can expose this problem before cutting.

The National Electrical Contractors Association emphasizes accurate layout and workmanship in electrical installation practices, while the International Code Council requires listed equipment to be installed according to its instructions. Those requirements support careful measurement, but they do not replace field judgment.

Even experienced workers can misread a dusty edge or measure the decorative trim instead of the housing. A second check is inexpensive. Recutting a finished ceiling is not.

Tools and Steps for Measuring the Ceiling Opening

Why Measure Recessed Light Ceiling Cutout Size Correctly?

Accurate measurement begins with a safe, simple tool kit: a tape measure, steel ruler, flashlight, pencil, and digital caliper. Turn off the circuit breaker before removing the trim. Measure the ceiling opening, not the visible light housing. Record the diameter at two points, because drywall holes are rarely perfectly round. Measure the ceiling thickness and available depth as well. A short inspection mirror can reveal framing, insulation, or an obstructing junction box.

A two-millimeter error may cause loose clips, visible gaps, or difficult installation. Check the manufacturer’s required cutout range against your smallest and largest readings. Do not confuse the fixture’s outer diameter with its cutout dimension. The U.S. Department of Energy reports that LED lighting uses at least 75% less energy than incandescent lighting and can last up to 25 times longer (DOE Energy Saver). That efficiency matters, but poor fitting can still waste time and materials.

Mark every measurement immediately. Include the ceiling material, opening shape, and measured depth. Photograph the opening before closing the circuit box. I once measured only the front edge and missed a slightly oval cutout. The replacement fit badly. Recheck it. Professional guidance from the DOE Solid-State Lighting program also emphasizes application conditions, installation quality, and reliable performance data. Measurements should support those conditions, not replace them.

How Cutout Size Affects Recessed Light Installation

Why Measure Recessed Light Ceiling Cutout Size Correctly?

Cutout size directly affects recessed light installation. A hole that is too small can crush the housing or damage the ceiling surface. A hole that is too large may leave visible gaps around the trim. Neither problem is easy to hide, especially on a smooth white ceiling under strong downlight.

Professional installation starts with the fixture’s specified cutout diameter, not its visible trim diameter. Installers should measure the template, confirm joist clearance, and check ceiling thickness before cutting.

A 1/8-inch error can cause movement, uneven trim, or repeated adjustment. Spring clips may not grip securely in oversized openings. That small mistake becomes obvious when the light hangs lower than its neighbors.

Energy performance makes accuracy more important.

ENERGY STAR reports that LED lighting uses at least 75% less energy and can last up to 25 times longer than incandescent lighting. The U.S. Energy Information Administration has also reported that lighting uses roughly 17% of electricity in commercial buildings.

A poorly fitted fixture can reduce visual quality and encourage unnecessary replacement work. In practice, the “perfect” measurement is not always perfect; older ceilings may sag, crack, or contain hidden layers.

Recheck the opening after removing the old fixture. Measure twice. Cut once.

Common Measurement Errors and How to Avoid Them

Why Measure Recessed Light Ceiling Cutout Size Correctly?

A recessed light can look like a simple ceiling opening, but small errors create expensive rework. Many installers measure the visible trim instead of the actual cutout. That approach is unreliable. Trim can hide gaps, chipped drywall, or an opening that is slightly oversized. Measure the ceiling hole itself, using two perpendicular diameters. Record the smaller measurement, then compare it with the manufacturer’s required cutout range. A nominal six-inch light may not require a six-inch opening.

Depth is another common mistake. A correct diameter does not guarantee a suitable installation. Measure the available ceiling depth from the finished surface to the nearest obstruction. Check joists, ductwork, insulation, and wiring paths. The U.S. Department of Energy’s Residential Lighting End-Use Consumption Study identifies recessed downlights as a significant residential lighting category, so repeated sizing errors can affect many renovation projects. The impact is practical, not theoretical.

Lighting efficiency makes accuracy more valuable. The International Energy Agency’s Energy Efficiency 2023 report estimates lighting uses about 15% of global electricity. A poorly fitted fixture may leak light, sit unevenly, or require replacement sooner. I have seen installers measure only once, usually at the widest point. That is easy to regret. Measure twice, photograph the opening, and note the ceiling material. Drywall, plaster, and acoustic panels can react differently during cutting. Leave clearance only when the installation instructions permit it. Some measurements still feel obvious, but they are not.

Why Measure Recessed Light Ceiling Cutout Size Correctly? - Common Measurement Errors and How to Avoid Them

Measurement Dimension Typical Example or Data Common Measurement Error Likely Result Correct Measurement Method Prevention Tip
Required cutout diameter Example: 100 mm (3.94 in) specified by the fixture instructions Using the visible trim diameter instead of the ceiling cutout diameter The fixture may not fit, or the trim may fail to cover the opening Read the manufacturer's stated cutout dimension and compare it with the actual opening Treat trim size and cutout size as two separate measurements
Existing hole diameter Measure at several points; a nominal 4 in hole may be slightly oval or uneven Taking only one measurement across the opening An oversized section may prevent spring clips from gripping the ceiling Measure two perpendicular diameters and record the larger value Use a template or adjustable hole saw only after confirming the required diameter
Cutout-to-fixture tolerance The acceptable range is fixture-specific; do not assume a universal tolerance Adding extra clearance “for convenience” without checking the installation guide Loose mounting, visible gaps, or a fixture that shifts during use Compare the measured hole with the fixture's minimum and maximum permitted cutout dimensions Do not enlarge the opening until the fixture is physically available for verification
Ceiling thickness Common drywall sheets are often 12.5 mm (about 1/2 in), but assemblies vary Measuring the hole diameter but ignoring the ceiling material thickness Clips or brackets may not lock correctly, especially in thick or layered ceilings Measure the thickness at the opening edge, including additional board, plaster, or panel layers Confirm the fixture's permitted ceiling-thickness range before installation
Clearance above the ceiling Record the unobstructed vertical space available above the opening Checking only the hole location from below The fixture body, driver, or junction box may hit a joist or duct Inspect above the ceiling where accessible and measure the available depth and width Mark joists, ducts, pipes, and existing wiring before cutting
Location from framing Measure the distance from the proposed center point to nearby joists or framing members Estimating the center point without locating the framing The cutout may overlap structural framing or leave insufficient room for mounting clips Locate framing first, then mark the center and confirm the full cutout perimeter Use a stud finder, inspection opening, or access from above where appropriate
Roundness and edge quality The opening should remain close to circular, with a firm and undamaged edge Cutting freehand or enlarging one side unevenly Uneven trim contact, air gaps, or clips positioned too close to a damaged edge Use a marked template and inspect the entire circumference after cutting Repair weak or broken edges before fitting the light
Unit conversion 1 in = 25.4 mm; 4 in = 101.6 mm Confusing a nominal inch size with its exact metric equivalent The marked opening may be cut too small or too large Convert units precisely and use the same unit system for the template and tape measure Write the final target dimension in both millimetres and inches
Final pre-cut verification Verify diameter, depth, framing clearance, wiring route, and fixture instructions Cutting immediately after marking the center point Rework, ceiling damage, installation delays, or an unsuitable mounting position Complete a five-point check before making the permanent opening Switch off power and follow applicable electrical and building requirements

Note: Recessed-light cutout dimensions, ceiling-thickness limits, clearance requirements, and mounting tolerances vary by fixture design. Always verify the installation instructions and applicable local requirements before cutting.

FAQS

Why do accurate recessed light cutout measurements matter?

Accurate measurements create a firm, even fit. A hole a few millimeters too wide may leave visible gaps around the trim.

Should I measure the trim or the ceiling opening?

Measure the actual ceiling opening. The trim can hide chipped drywall, uneven edges, or an oversized hole.

How many directions should I measure?

Measure at least two perpendicular diameters. Three directions are better when the opening looks irregular or slightly oval.

What should I do with different measurements?

Record the smallest and largest readings. Compare them with the required cutout range, not just the light’s nominal size.

Can a four-inch light require a different opening?

Yes. A light described as four inches may need an opening near 3.9 or 4.1 inches. Always check its installation instructions.

Does ceiling depth affect installation?

Yes. Measure from the finished ceiling surface to nearby joists, ducts, insulation, and wiring. Diameter alone is not enough.

Can a paper template help?

Yes. Place the template over the opening before cutting. It can reveal an oval shape or an unexpected edge.

What mistakes commonly cause rework?

Measuring once, choosing the widest point, and ignoring ceiling material are common mistakes. A second check is cheap.

How can I make the measurement process more reliable?

Measure twice, photograph the opening, and note whether it is drywall, plaster, or an acoustic panel. Small details matter.

What if the opening is already slightly too large?

Stop and inspect the installation instructions. The trim may cover a small gap, but not every fixture allows extra clearance. Recutting is unpleasant.

Conclusion

A recessed light ceiling cutout size is the diameter or shape of the opening made in the ceiling for a recessed light housing. Measuring it accurately is essential because the opening must match the fixture’s specifications. A cutout that is too small may prevent the light from fitting, while one that is too large can leave visible gaps, weaken the mounting area, or require additional repair work.

To understand how to measure a recessed light ceiling cutout size, use a tape measure, ruler, or caliper to check the opening from edge to edge at several points. Record the smallest consistent measurement, and confirm whether the opening is round, square, or another shape. Before installation, remove trim if necessary, measure carefully without including the decorative bezel, and compare the result with the installation instructions. Avoid measuring at an angle, relying on estimates, or confusing the housing size with the required cutout size. Accurate measurements help ensure a secure fit, clean appearance, and smoother installation.

Mason

Mason

Mason is a seasoned marketing professional with a deep expertise in the company's offerings and a passion for driving brand awareness. With a strong background in digital marketing strategies, he has an innate ability to connect with diverse audiences and effectively communicate product benefits.......