Designing recessed lighting for an open floor plan requires more than placing fixtures in a neat ceiling grid. Kitchens, dining areas, living rooms, and circulation paths often share one visual field. Each zone needs useful light without creating harsh brightness differences. A practical how to guide layout design for recessed lighting in open floor plans should begin with room function, ceiling height, beam spread, and furniture placement. The same spacing rarely serves every activity.
The U.S. Department of Energy reports that qualified LED lighting uses at least 75% less energy and lasts up to 25 times longer than incandescent lighting. Efficiency matters, but comfort matters too. The Illuminating Engineering Society emphasizes task-based illuminance, glare control, and visual quality in lighting design. Lighting designer Randall Whitehead has said, “Lighting is the jewelry of architecture.” His observation fits open plans, where light can highlight a dining table, soften a seating area, or guide movement between zones.
A perfect grid is not always a perfect plan. It can place bright pools over empty flooring while leaving countertops dim. A better layout usually combines aligned downlights with focused task lighting and carefully controlled dimming. The spacing should respond to walls, cabinet faces, artwork, and sightlines. Even experienced designers can misjudge beam overlap after installation. That is why mock-ups, adjustable trims, and nighttime testing remain valuable. This guide examines practical spacing methods, common layout errors, energy considerations, and ways to create balanced illumination without making the ceiling look crowded. Expect useful rules, but question them when the room’s geometry or daily use demands something different.
Define the Planning Goals for an Open-Plan Recessed Lighting Layout
What Is the Best Recessed Lighting Layout for Open Plans?
Before placing a single fixture, define what the open plan must support. An office may need comfortable screen work, clear circulation, and adaptable meeting zones. The IES Lighting Handbook commonly references 300–500 lux for office tasks, but uniform brightness is not the only goal. A dining area may need softer light, while a kitchen island needs stronger vertical and horizontal illumination. Write these priorities down.
Map the room by activities, not by ceiling grids. Mark desks, counters, walkways, seating, and daylight openings. Keep recessed fixtures away from direct screen reflections and align them with work surfaces when possible. EN 12464-1 uses a unified glare rating of 19 for many office environments, which highlights the need to control brightness and viewing angles. Glare is easy to underestimate on a drawing.
Energy and control goals also deserve early attention. The U.S. Department of Energy’s 2023 solid-state lighting analysis reports that modern LED systems can exceed 100 lumens per watt, yet efficiency depends on controls and actual use. Divide the plan into zones. Add dimming near windows and occupancy control in low-use areas. I often see layouts fail because every fixture shares one switch. That choice saves wiring, but it limits comfort and wastes available daylight. A small mock-up at desk height can expose errors before installation.
Map Room Zones, Furniture, and Key Activity Areas
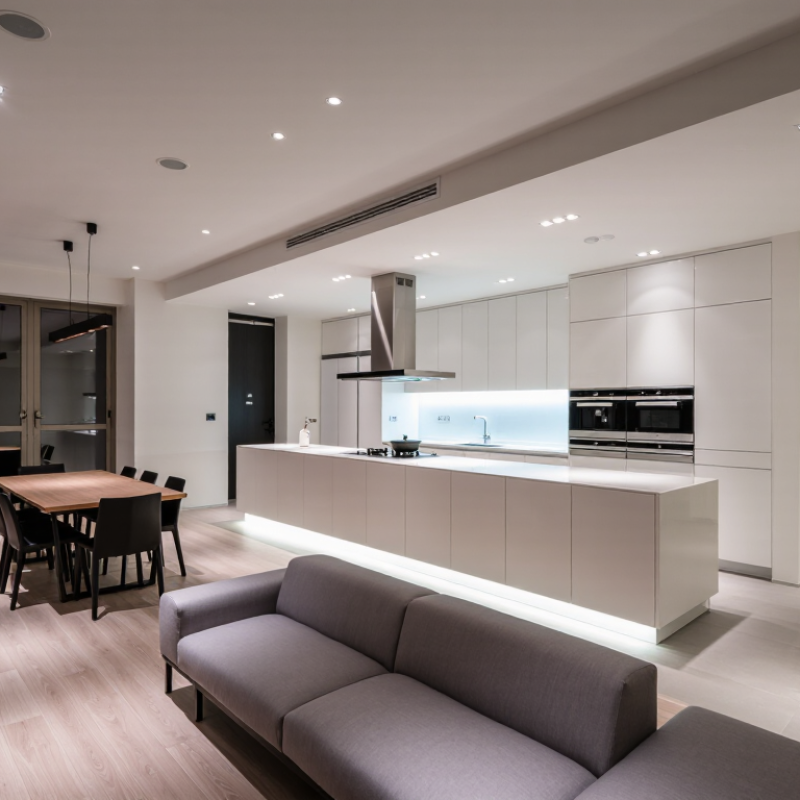
In an open-plan room, recessed lighting should follow activities, not simply form a perfect grid. Draw the room’s zones before marking ceiling positions. Include the living area, dining table, kitchen counters, entry path, and work corner. Then place furniture on the plan. A sofa may block light from a wall, while a tall cabinet can create unwanted shadows. Start with the room. Mark the areas that need focused, ambient, or softer illumination. Keep it flexible.
Over a dining table, center several fixtures along the table’s length rather than the entire room. In a kitchen, align downlights with counter edges, not cabinet doors. This helps your body avoid casting shadows while preparing food. For a reading chair, place one fixture slightly forward and to the side. Aim for comfortable brightness without glare on screens or glossy surfaces. Use wider beam spreads for open seating and narrower beams for artwork or task zones. Not every zone needs equal light. Leave breathing space.
I often measure furniture twice because small changes affect the ceiling plan. My first layout placed a light directly above a sofa, which felt harsh during evening use. That mistake taught me to check sightlines from seated positions. Before installation, test the plan with temporary lamps or a ceiling layout marked on paper. Review switching groups separately, so cooking light does not illuminate the entire room. A qualified electrician should confirm spacing, ceiling conditions, dimmer compatibility, and local safety requirements. If the room changes later, movable furniture may expose weaknesses in the original arrangement.
Calculate Fixture Spacing, Beam Coverage, and Ceiling Placement
What Is the Best Recessed Lighting Layout for Open Plans?
Open-plan lighting begins with the workplane, not the ceiling grid. Measure the ceiling height above desks, then use the fixture’s spacing criterion. A practical formula is spacing = mounting height above the workplane × spacing criterion. For example, a 2.4-metre mounting height and a 1.0 criterion suggest roughly 2.4 metres between fixtures. Keep the first row about half that distance from walls. This reduces bright edges and dark corners.
Beam coverage needs a second check. Estimate beam diameter with this formula: 2 × mounting height × tan(beam angle ÷ 2). A 60-degree beam at 2.4 metres covers about 2.8 metres at floor level. Furniture, partitions, and shelving will reduce useful coverage. The IES Lighting Handbook recommends approximately 300–500 lux for many office tasks. EN 12464-1:2021 also emphasizes uniformity, with a common office target of at least 0.60. These figures guide placement, but they do not replace photometric testing.
Tips: Use a reflected ceiling plan before cutting openings. Aim for overlapping beam edges, not isolated pools of light. Keep fixtures away from tall cabinets. Test one sample row at night. I have seen mathematically correct layouts feel harsh after installation. Recheck glare, shadows, and screen reflections before finalizing the grid. Some rooms still need adjustment.
What Is the Best Recessed Lighting Layout for Open Plans?
Use ceiling height and beam coverage to estimate fixture spacing. The spacing guideline shown is approximately 0.8 times the ceiling height, while beam diameter is calculated for a 40° beam angle at the ceiling plane.
Planning note: Place the first row about half the recommended spacing from the wall, then maintain even spacing across the open-plan area. Final layouts should be verified with the fixture photometric file, target illuminance, ceiling height, and task requirements.
Layer Recessed Lights with Ambient, Task, and Accent Lighting
What Is the Best Recessed Lighting Layout for Open Plans?
Open-plan rooms need more than evenly spaced ceiling lights. A layered plan combines ambient, task, and accent lighting, so each zone feels useful and comfortable. Use recessed lights for general brightness, then support them with focused fixtures near work surfaces, seating, and display areas.
In a kitchen, place ambient downlights along clear walking paths, not directly above cabinet doors. Add task lighting over islands and counters, where shadows can make chopping or reading difficult. In the living area, use softer recessed lights near seating, while adjustable fixtures can highlight artwork, shelving, or textured walls. Keep the beam direction intentional. Random aiming often creates glare.
Tips: Sketch the room by activity zones before marking the ceiling. Leave space between downlights and walls to prevent harsh scallops. Test one section at night. A dimmer can reveal problems that a daytime plan hides. Warm light usually feels calmer, but the wrong color can make finishes appear dull. I have found that symmetry looks attractive on paper, yet practical furniture placement may matter more. Recheck the layout after choosing cabinets, sofas, and tall furniture. Their shadows will change the result. Controls should separate kitchen, dining, and lounge areas. That small decision improves flexibility every evening.
Review Glare, Switching Controls, Energy Use, and Future Adjustments
For an open-plan room, recessed lights should support tasks without creating bright spots on screens. Glare is sneaky. The Illuminating Engineering Society recommends evaluating luminance, viewing angles, and contrast, not spacing alone. I usually mock up one ceiling bay first, then inspect it from desks, walkways, and meeting areas. A deep trim can reduce high-angle brightness, but excessive shielding may lower useful light. That trade-off is easy to miss.
Separate lighting into perimeter, work, and circulation zones. Use wall switches for simple control, then add dimming where daylight changes throughout the day. Vacancy sensors can reduce waste in meeting rooms, while daylight-responsive controls suit window zones. The U.S. Department of Energy reports that LED lighting uses at least 75% less energy than incandescent lighting. Yet low wattage does not guarantee comfort. Over-lighting still increases heat, glare, and operating costs. The layout needs measurement.
Future adjustments deserve space in the design. Leave accessible junction points, flexible control wiring, and a few spare ceiling positions. Furniture rarely stays still. A 2024 U.S. Department of Energy solid-state lighting report notes continuing gains in LED efficacy, so today’s fixed layout may age quickly. I would document circuit zones and dimming limits before installation. My first plan is rarely perfect. Test one occupied area for a week, record complaints, and revise spacing before repeating the pattern.
FAQS
List each activity, such as screen work, cooking, dining, walking, and informal meetings. Different activities need different brightness levels. Write the priorities down.
No. Place fixtures according to furniture and activities, not a perfect grid. Map desks, counters, pathways, seating, and windows before marking ceiling positions. Grids can look tidy but still feel uncomfortable.
Many office tasks use roughly 300–500 lux as a practical reference range. Uniform brightness is not always necessary. A dining area may need softer light, while a kitchen island needs stronger illumination.
Keep fixtures away from direct screen reflections and align them with work surfaces. Check brightness from normal seated positions. Glare is easy to miss on paper.
Center several fixtures along the table’s length. Do not center them only within the whole room. This keeps the table visually supported.
Align downlights with counter edges rather than cabinet doors. This reduces shadows from your body during food preparation. A small shift can matter.
Divide the room into separate switching or dimming groups. Use dimming near windows and occupancy control in low-use areas. One switch for every fixture often wastes daylight and limits comfort.
Mark ceiling positions on paper and use temporary lamps at desk height. Check views from sofas, chairs, counters, and screens. My first layout once placed a harsh light directly above a sofa. That mistake changed my planning method.
Confirm fixture spacing, ceiling conditions, dimmer compatibility, and local safety requirements. A qualified electrician should review the final plan. Furniture may move later, so leave some flexibility.
Conclusion
The best recessed lighting layout for an open-plan space begins with clear planning goals: comfortable visibility, balanced illumination, and a welcoming atmosphere across connected areas. Start by mapping room zones, furniture arrangements, circulation paths, and key activity areas such as seating, dining, cooking, or workspaces. This approach helps determine where light is most needed and prevents fixtures from being placed without purpose. The process should explain how to guide layout design for recessed lighting in open floor plans while preserving visual continuity between zones.
Next, calculate fixture spacing, beam coverage, and ceiling placement according to room dimensions, ceiling height, and the intended brightness level. Combine recessed lights with ambient, task, and accent lighting to add flexibility and depth. Finally, review glare control, switching arrangements, energy use, and future adjustments. Separate controls for different zones can improve comfort and efficiency, while thoughtful placement makes it easier to adapt the layout when furniture, activities, or room functions change.

