7 Best Tools for Replacing an Indoor Ceiling Light?

Time:2026-10-15 Author:Ethan
0%

Replacing an indoor ceiling light looks simple, but the right tools make the job safer and more controlled. If you are asking, “what tools do i need to replace an indoor ceiling light,” this guide offers a practical starting point. You will need more than a screwdriver. A non-contact voltage tester, insulated screwdrivers, wire strippers, pliers, a step ladder, and electrical tape can each serve a specific purpose. A flashlight also helps when the ceiling box sits in a dim corner.

Safety comes before speed. Turn off the correct circuit breaker, then test the wires before touching them. Do not rely only on the wall switch. It can fail, or another circuit may be involved. A sturdy ladder keeps both feet balanced while you support the fixture. A wire connector tool or small parts tray may also prevent dropped screws and loose connections. Simple details matter.

The seven tools discussed here are selected for common residential ceiling-light replacements. Their value depends on the fixture, wiring condition, and ceiling height. Older wiring may need professional inspection. Some installations are less straightforward than they appear. I have found that rushing the final connection creates more trouble than removing the old light. Check every terminal, match the manufacturer’s instructions, and stop if wires are damaged, hot, or confusing. When uncertainty remains, consult a licensed electrician. A better tool cannot replace qualified judgment.
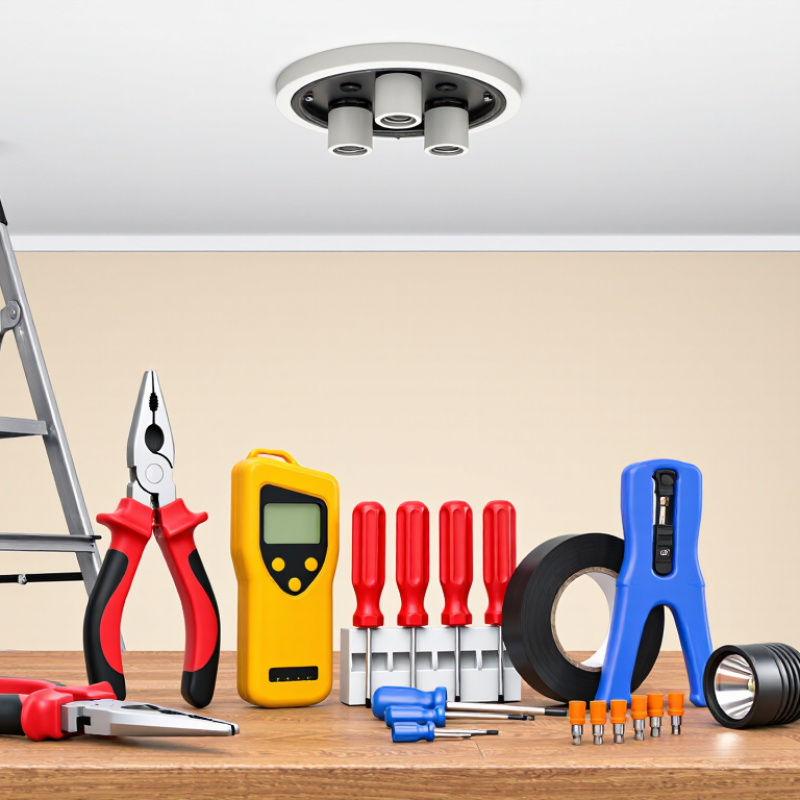
7 Best Tools for Replacing an Indoor Ceiling Light?

Essential Tools for Replacing an Indoor Ceiling Light

Replacing an indoor ceiling light requires more than a screwdriver. The essential tools are a non-contact voltage tester, two-pole voltage tester, insulated screwdrivers, wire stripper, combination pliers, adjustable wrench, and stable step ladder. A headlamp is also useful when the breaker is off, although it is an eighth item.

Use the circuit breaker, not only the wall switch. Confirm power is absent with a non-contact tester, then verify again with a two-pole tester.

The National Fire Protection Association’s Home Structure Fires report found electrical distribution and lighting equipment involved in about 24% of reported home fires from 2015 to 2019. That figure makes careful testing practical, not excessive.

Choose screwdrivers that fit the fixture screws tightly. Loose tips can damage heads or slip near wiring. A wire stripper helps remove insulation cleanly, while pliers create firm bends without crushing conductors. The ladder should stand on a level floor, with both feet planted. Never balance on a chair.

I still recheck every connection. It takes seconds. Match the ceiling conductors with the fixture instructions, secure the grounding conductor, and tuck wires gently into the electrical box. Do not force a crowded cover.

If insulation is brittle, wires are damaged, or the box moves, stop and ask a qualified electrician. OSHA’s electrical-safety guidance emphasizes de-energizing circuits and verifying their condition before work, a habit worth following even for a small household repair.

Safety Equipment and Electrical Preparation

Replacing an indoor ceiling light safely begins before the old fixture leaves the ceiling. Turn off the correct circuit at the service panel, not only the wall switch. Test the wires with a non-contact voltage tester, then confirm with a two-pole tester when possible. Keep insulated screwdrivers, wire strippers, a sturdy step ladder, safety glasses, and a flashlight nearby. Wear shoes with dry, non-slip soles. Never work with wet hands.

Electrical preparation matters as much as tool choice. Photograph the existing connections before disconnecting anything. Label each conductor with removable tape, especially when several cables enter the ceiling box. Check the box for cracks, loose mounting, heat damage, or signs of overloading. A circuit tester can reveal an unexpected live conductor, but it cannot replace careful identification. If the wiring looks brittle or confusing, stop and ask a qualified electrician. Guessing is not a safety method.

Tips: Place a small tray on the ladder for screws, because dropped hardware disappears quickly. Support the fixture while loosening the final screw. I once rushed this step in a practice setup, and the fixture swung hard enough to damage the mounting bracket. That mistake was preventable. Do not trust wire color alone; older installations may differ. Recheck power before touching conductors. Keep the work area clear, and tell others not to restore the breaker.

Removing the Existing Ceiling Light Fixture

Removing an existing ceiling light fixture requires patience, steady support, and the right tools. The most useful seven are a non-contact voltage tester, insulated screwdrivers, combination pliers, a wire stripper, a stable step ladder, a flashlight, and wire connectors. Power off at the breaker. Do not rely only on the wall switch.

Stand on the ladder with both feet secure, then inspect the fixture before touching its wires. Use the voltage tester on the canopy, terminals, and nearby metal parts. Test it against a known live source first, because testers can fail or give confusing readings. I once underestimated poor lighting and loosened the wrong screw, so a headlamp is more reliable than a phone light.

Support the fixture with one hand while removing its cover screws. If it is heavy, ask another person to hold it. Photograph the wiring before disconnecting anything, then label each conductor with removable tape. Loosen the wire connectors with pliers and separate the wires carefully. Do not pull on the insulation. Check for heat damage, brittle insulation, or loose mounting hardware. Stop if the wiring is unfamiliar, damaged, or lacks a clear grounding path. A qualified electrician should handle those conditions. Keep exposed wires capped while the circuit remains off, and never leave the fixture hanging from its electrical connections.

7 Best Tools for Replacing an Indoor Ceiling Light? - Removing the Existing Ceiling Light Fixture

Rank Tool Primary Use Recommended Features Why It Is Useful Safety Note
1 Two-Pole Voltage Tester Verifying that the lighting circuit is de-energized before touching conductors. AC voltage range suitable for the local electrical system, clearly visible or audible readings, and insulated test leads. Provides a more dependable voltage check than relying only on whether the light turns off. Turn off the correct circuit breaker and test the instrument on a known live source before and after testing the ceiling wires.
2 Insulated Screwdriver Set Removing fixture screws, terminal screws, mounting brackets, and cover plates. Phillips and slotted tips, correctly sized tips, and durable insulated handles. Covers the fasteners commonly found on light fixtures and electrical boxes. Insulated handles do not make energized work safe; always disconnect power before working.
3 Wire Stripper and Cutter Removing damaged insulation and preparing conductors for new connections. Wire-size markings that match the circuit conductors and clean-cutting blades. Helps create properly exposed copper without nicking the conductor. Use the correct stripping gauge; damaged or severely overheated wiring should be evaluated by a qualified electrician.
4 Long-Nose Pliers Holding, bending, and positioning wires in a crowded ceiling box. Slim jaws, comfortable grip, and insulated handles. Makes it easier to form wire loops and guide conductors into connectors without pulling on the cable. Do not use pliers to loosen energized terminals or force wires into an overcrowded box.
5 Approved Wire Connectors Joining the fixture wires to the supply and grounding conductors. Connectors rated for the conductor material, wire-size range, circuit voltage, and number of wires being joined. Creates mechanically secure and electrically insulated connections when installed correctly. Follow the connector instructions and confirm that no bare copper is exposed outside the connector.
6 Nonconductive Step Ladder Providing stable access to the ceiling fixture. Correct height, wide slip-resistant feet, a stable platform, and a load rating that exceeds the user and tools. Improves balance and reduces the need to overreach while supporting the fixture. Place it on a level surface, keep the top step off-limits unless designed for standing, and reposition it instead of leaning.
7 Magnetic Parts Tray or Small Container Holding screws, wire connectors, and mounting hardware during removal. Shallow, stable design with enough capacity for the fixture’s fasteners. Prevents small parts from falling and helps keep original hardware organized for reference. Keep the container away from exposed conductors and never place tools or parts on an unstable ladder step.
Important: Switch off the circuit breaker, verify the absence of voltage with an appropriate tester, and follow local electrical codes. Stop and consult a qualified electrician if the wiring is damaged, the ceiling box is loose or unsupported, multiple circuits are present, or the wiring configuration is unclear.

Installing and Connecting the New Ceiling Light

Replacing an indoor ceiling light starts with controlled preparation. Gather a voltage tester, insulated screwdrivers, wire strippers, pliers, a ladder, and wire connectors. Turn off the correct circuit breaker, then test every wire at the ceiling box. Do not trust the wall switch alone. The tester should show no voltage before you touch anything. Keep the ladder on a level floor, and ask someone to steady it when needed.

Remove the old fixture carefully, supporting its weight with one hand. Check that the ceiling box is firmly attached and rated for the new light. A loose box can make the fixture shake or pull away from the ceiling. Match the supply wires with the fixture instructions, usually live, neutral, and grounding wires. Connect each pair securely, cap unused wires, and gently tuck them into the box. Never force crowded wiring into a narrow space.

Attach the mounting bracket before lifting the light into place. Tighten the screws evenly, but do not crush the ceiling surface. I once rushed this step and had to realign the fixture later. Small mistakes become visible under bright light. Restore power only after checking every connection and keeping tools away from exposed parts. Test the switch from a safe position.

If the wiring is damaged, confusing, or lacks grounding, stop and contact a qualified electrician. Safety matters more than finishing quickly.

Testing the Fixture and Troubleshooting Common Issues

When an indoor ceiling light stops working, begin with seven practical tools: a non-contact voltage tester, multimeter, insulated screwdrivers, wire stripper, combination pliers, flashlight, and stable ladder. Turn off the circuit breaker before removing the fixture cover. Confirm the light is dead, then test the ceiling wires with the voltage tester. Do not trust the wall switch alone. Switches can fail.

A multimeter provides a more reliable check. Set it correctly for AC voltage, and test between the hot wire and neutral wire. Then test hot to ground, if a grounding wire is available. I once relied only on a non-contact tester and missed a weak connection. That mistake changed my inspection routine. Check the bulb, socket contacts, wire connectors, and visible insulation. Look for dark marks, melted plastic, or loose screws.

Flickering often points to a loose connection, failing switch, or damaged socket. A humming sound may indicate vibration, poor contact, or an incompatible control device. If the breaker trips repeatedly, stop resetting it. The fault could involve damaged wiring or an overloaded circuit. Do not work around heat damage or unknown wiring. Contact a qualified electrician when readings seem inconsistent, the box feels loose, or the fixture has no clear grounding path. A careful pause is better than a confident guess.

7 Best Tools for Replacing an Indoor Ceiling Light

Testing the fixture and troubleshooting common issues

The chart shows typical readings on a nominal 120 V residential circuit. A hot-to-neutral or hot-to-ground reading is normally close to 120 V when power is present. A switched-hot reading should be near 120 V with the wall switch on and near 0 V when it is off. Always turn off the breaker before using continuity mode or replacing the fixture.

Recommended tools include a non-contact voltage tester, two-pole voltage tester, digital multimeter, continuity tester, circuit breaker finder, insulated screwdriver set, and wire stripper. Voltage can vary by location and circuit conditions, so verify the actual rating of the installation before proceeding.

FAQS

What tools are essential for replacing an indoor ceiling light?

Keep a non-contact voltage tester, two-pole tester, insulated screwdrivers, wire strippers, and pliers nearby. A stable step ladder, adjustable wrench, safety glasses, and flashlight are also useful.

Is turning off the wall switch enough?

No. Turn off the correct circuit breaker at the service panel. Test every ceiling wire before touching it. The switch alone may not disconnect power.

Why should power be tested twice?

A non-contact tester gives a quick warning about live voltage. A two-pole tester provides a second check when available. Recheck power.

How can I prepare the existing wiring?

Photograph the connections before disconnecting them. Use removable tape to label conductors when several cables enter the box. Do not trust wire color alone.

What should I inspect in the ceiling box?

Look for cracks, loose mounting, heat damage, movement, or crowded wiring. The box must support the new fixture properly. A moving box needs attention.

How should the old fixture be removed?

Support its weight with one hand while loosening the final screw. Place screws in a small tray on the ladder. Dropped hardware disappears fast.

How are the new light’s wires connected?

Follow the fixture instructions and match the supply conductors carefully. Secure live, neutral, and grounding connections as required. Cap unused wires and tuck everything gently into the box.

What ladder practices help prevent accidents?

Place the ladder on a level floor with both feet planted. Wear dry, non-slip shoes and keep the area clear. Never stand on a chair.

When should I stop and call a qualified electrician?

Stop if wires are brittle, damaged, confusing, or missing grounding. Also stop when the electrical box moves or the wiring feels overcrowded. Guessing is not a safety method.

What mistakes are easy to make during installation?

Rushing the mounting bracket can leave the fixture crooked or unstable. I still recheck every connection, even when the repair seems simple. Small errors show under bright light.

Conclusion

Replacing an indoor ceiling light requires more than a new fixture. The essential tools typically include a voltage tester, insulated screwdrivers, wire strippers, wire connectors, pliers, a stable ladder, and basic safety equipment such as gloves and protective eyewear. Before starting, turn off power at the circuit breaker, verify that the wires are no longer energized, and prepare a clean, well-lit workspace. Knowing what tools do i need to replace an indoor ceiling light helps ensure the project is organized and reduces avoidable mistakes.

The process involves carefully removing the existing fixture, labeling or noting wire connections, and checking that the ceiling box can support the replacement light. Connect the new fixture according to its instructions, secure all wires inside the box, and fasten the fixture firmly to the mounting bracket. After restoring power, test the light and switch. If it does not work, turn the power off again and check the connections, bulb, switch, and breaker. Stop and consult a qualified electrician if wiring is damaged, unclear, or unsafe.

Ethan

Ethan

Ethan is a seasoned marketing professional with a deep expertise in our company's innovative product line. With a passion for sharing knowledge and insights, he takes the lead in regularly updating our corporate blog, where he explores industry trends, product features, and effective marketing......